Saturday, August 24, 2024

Coding for ATTiny microprocessor chips

It's better to use an ATTiny microprocessor than an Arduino or Raspberry development board such as the Arduino Nano or the Raspberry Pi Pico. When it comes to chips like the ATTiny13, space is at a premium. This microconroller has only 1K for program storage and 64 bytes for variables. While program memory can be used for storage via progmem, a different programming technique is worthwhile for such small microcontrollers.
The 8-pin chip in the middle of the small breadboard is the ATTiny13A micro-controller. Small but mighty.

This is a C++ Morse Code program creator written in Python.
#!/usr/bin/env python3
# -*- coding: utf-8 -*-
"""
Created on Fri Aug 23 20:20:01 2024

@author: zephod beeblebrox
"""

# Morse Code Dictionary
MORSE_CODE_DICT = {
    'A': '.-', 'B': '-...', 'C': '-.-.', 'D': '-..', 'E': '.', 'F': '..-.',
    'G': '--.', 'H': '....', 'I': '..', 'J': '.---', 'K': '-.-', 'L': '.-..',
    'M': '--', 'N': '-.', 'O': '---', 'P': '.--.', 'Q': '--.-', 'R': '.-.',
    'S': '...', 'T': '-', 'U': '..-', 'V': '...-', 'W': '.--', 'X': '-..-',
    'Y': '-.--', 'Z': '--..', '1': '.----', '2': '..---', '3': '...--',
    '4': '....-', '5': '.....', '6': '-....', '7': '--...', '8': '---..',
    '9': '----.', '0': '-----', ', ': '--..--', '.': '.-.-.-', '?': '..--..',
    '/': '-..-.', '-': '-....-', '(': '-.--.', ')': '-.--.-', ' ': '/'
}

def message_to_morse(message):
    # Convert message to uppercase
    message = message.upper()

    for char in message:
        if char == ' ':
            print("    delay(WORD_SPACE - LETTER_SPACE);")
        else:
            morse_char = MORSE_CODE_DICT.get(char, '')
            for i, symbol in enumerate(morse_char):
                if symbol == "-": 
                    print ("    sendDash();") 
                if symbol == ".": 
                    print("    sendDot();")
#                print(symbol)
                if i < len(morse_char) - 1:
                   print("    delay(SYMBOL_SPACE);")
            print("    delay( LETTER_SPACE - SYMBOL_SPACE);")

if __name__ == "__main__":
    # Input message from user
    message = input("//Enter your message: ")

    print("#define DOT_DURATION 50   // Duration of a dot in milliseconds")
    print ("#define DASH_DURATION (3 * DOT_DURATION)   // Duration of a dash")
    print ("#define SYMBOL_SPACE DOT_DURATION   // Space between symbols in the same letter")
    print("#define LETTER_SPACE (3 * DOT_DURATION)   // Space between letters")
    print("#define WORD_SPACE (7 * DOT_DURATION)   // Space between words")
    print("#define MESSAGE_DELAY 30000   // 30-second delay between messages")
    print("#define MORSE_PIN 4   // Define the pin used for Morse code output")
    print("void sendDot() {")
    print("    digitalWrite(MORSE_PIN, HIGH);   // Set the pin high")
    print("    delay(DOT_DURATION);")
    print("    digitalWrite(MORSE_PIN, LOW);   // Set the pin low")
    print("    }")
    print("void sendDash() {")
    print("    digitalWrite(MORSE_PIN, HIGH);   // Set the pin high")
    print("    delay(DASH_DURATION);")
    print("    digitalWrite(MORSE_PIN, LOW);   // Set the pin low")
    print("    }")
    print("void setup() {")
    print("    pinMode(MORSE_PIN, OUTPUT);   // Set the pin as an output")
    print("}")
    print("void loop() {")

    # Convert and print in Morse code format
    message_to_morse(message)
    
    print("    delay(MESSAGE_DELAY);")
    print("}") 

Entering a simple message such as "a b c" produces this output:

 //Enter your message: a b c

#define DOT_DURATION 50   // Duration of a dot in milliseconds

#define DASH_DURATION (3 * DOT_DURATION)   // Duration of a dash

#define SYMBOL_SPACE DOT_DURATION   // Space between symbols in the same letter

#define LETTER_SPACE (3 * DOT_DURATION)   // Space between letters

#define WORD_SPACE (7 * DOT_DURATION)   // Space between words

#define MESSAGE_DELAY 30000   // 30-second delay between messages

#define MORSE_PIN 4   // Define the pin used for Morse code output

void sendDot() {

    digitalWrite(MORSE_PIN, HIGH);   // Set the pin high

    delay(DOT_DURATION);

    digitalWrite(MORSE_PIN, LOW);   // Set the pin low

    }

void sendDash() {

    digitalWrite(MORSE_PIN, HIGH);   // Set the pin high

    delay(DASH_DURATION);

    digitalWrite(MORSE_PIN, LOW);   // Set the pin low

    }

void setup() {

    pinMode(MORSE_PIN, OUTPUT);   // Set the pin as an output

}

void loop() {

    sendDot();

    delay(SYMBOL_SPACE);

    sendDash();

    delay( LETTER_SPACE - SYMBOL_SPACE);

    delay(WORD_SPACE - LETTER_SPACE);

    sendDash();

    delay(SYMBOL_SPACE);

    sendDot();

    delay(SYMBOL_SPACE);

    sendDot();

    delay(SYMBOL_SPACE);

    sendDot();

    delay( LETTER_SPACE - SYMBOL_SPACE);

    delay(WORD_SPACE - LETTER_SPACE);

    sendDash();

    delay(SYMBOL_SPACE);

    sendDot();

    delay(SYMBOL_SPACE);

    sendDash();

    delay(SYMBOL_SPACE);

    sendDot();

    delay( LETTER_SPACE - SYMBOL_SPACE);

    delay(MESSAGE_DELAY);

}

And the Arduino compiler gives this message:

Sketch uses 414 bytes (40%) of program storage space. Maximum is 1024 bytes.

Global variables use 4 bytes (6%) of dynamic memory, leaving 60 bytes for local variables. Maximum is 64 bytes. 

Sunday, July 14, 2024

Reading analogue values on the Pi Pico

Fairly straightforward but take care with the pin positions. It's a case of connecting the centre pin of the potentiometer to the ADC pin, either of the two other pins to vref and the remaining pin to GND. The photo below looks good but the wires are on the wrong side of the board. They should be on the other side.

That was what NOT to do. Instead, let's install the jumpers correctly as below.


Having installed the jumpers it's possible to run the code and twiddle the preset with a jewelers screwdriver. Notice how the value returned from the ADC now changes.


And finally, here's the code: 

import machine
import utime
 
analog_value = machine.ADC(0)
 
while True:
    reading = analog_value.read_u16()     
    print("ADC: ",reading, " binary ", bin(reading), " test ", int(reading/256))
    utime.sleep(0.2)

All very simple and... it works.
 

Sunday, January 14, 2024

Using the IdeaSpark Nano091OLED

 The C++ code for the project is as follows:

#include <U8g2lib.h>

#include <U8x8lib.h>

#include <MUIU8g2.h>

#include<Arduino.h>

#ifdef U8X8_HAVE_HW_SPI

#include <SPI.h>

#endif

U8G2_SSD1306_128X32_UNIVISION_F_SW_I2C u8g2(U8G2_R0, A5, A4, U8X8_PIN_NONE);

void setup() {

  u8g2.begin();

}

void loop() {

  u8g2.clearBuffer();

  u8g2.setFont(u8g2_font_ncenB08_tr);

  u8g2.drawStr(0,10,"Hello, Ideaspark");

  u8g2.drawStr(0,25, "Nano V3 0.91""    OLED");

  u8g2.sendBuffer();

  delay(1000);

  u8g2.clearBuffer();

  u8g2.setFont(u8g2_font_ncenB08_tr);

  u8g2.drawStr(0,10,"BritishTechGuru");

  u8g2.drawStr(0,25, "The hairy dude!");

  u8g2.sendBuffer();

  delay(1000);

}


To use this, you need the latest version of the Arduino IDE (packaged as flatpak). Do not use the version that downloads from the Linux Mint app store. Use Sudo to install it.

Once you have that, install the library U8g2 then set the board to Arduino Nano and the Processor to AT Mega 328P

Then enter the code as shown and run it.


Your expected result will be an alternating display that states 

Hello, Ideaspark

Nano V3 0.91    OLED

then 

BritishTechGuru

The hairy dude!

The display flickers a bit at a delay of 1,000 but at a delay of 100 it's hard to see what is displayed. This is a very handy way of displaying vital statistics from a process without having to include an LED and all the wiring for that in a project.

Saturday, September 17, 2022

Basic Python external components

For those struggling with basic Python and coding, here's a very simple piece of code that might help you a lot.

Set this code as Main.py

#!/usr/bin/env python3

# -*- coding: utf-8 -*-

"""

Created on Sat Sep 17 10:34:38 2022

@author: nobody

"""

import imp

try:

    imp.find_module('externalsubroutine')

    found = True

    print("subroutine exists")

except ImportError:

    found = False

    print("Subroutine is missing")

#from externalsubroutine import Testit

import externalsubroutine

externalsubroutine.Testit()

print("Adding 5 and 6")

print(externalsubroutine.ReturnValue(5,6))


Now set this code in a file called "externalsubroutine.py"

#!/usr/bin/env python3

# -*- coding: utf-8 -*-

"""

Created on Sat Sep 17 10:31:47 2022

@author: nobody

"""

#try to code an external subroutine

def Testit():

    print("yeah, that works")

def ReturnValue(num1, num2):

    num3 = num1 + num2

    return num3


 When you run the code, your output should look similar to this:

runfile('/home/CERN/projects/external subroutines/mainstuff.py', wdir='/home/CERN/projects/external subroutines')

subroutine exists

yeah, that works

Adding 5 and 6

11


Congratulations - you can now put different batches of code into external library files. 

Sunday, August 7, 2022

How to calculate I2C addresses on a Raspberry Pi using Python

Occasionally when programming on a RP2040 it's necessary to identify the port an I2C address is using. This helps..

import machine


sda=machine.Pin(0)

scl=machine.Pin(1)


i2c=machine.I2C(0,sda=sda, scl=scl, freq=400000)


print('I2C address:')

print(i2c.scan(),' (decimal)')

print(hex(i2c.scan()[0]), ' (hex)') 

Saturday, August 6, 2022

Calculating distances between grid coordinates

 Calculating distances is more challenging than compass directions. There are three methods. One is the geometric method which is accurate enough but needs to be recalculated every 50 miles for real accuracy. Another is the Haversine method which is accurate to within about 10% and which was used for well over a hundred years. The best, however is the Vincenty method which is accurate to within 0.5mm.

Here's code comparing all 3 methods...

from vincenty import vincenty

import math

# Python 3 program for the

# haversine formula

def haversine(lat1, lon1, lat2, lon2):


    # distance between latitudes

    # and longitudes

    dLat = (lat2 - lat1) * math.pi / 180.0

    dLon = (lon2 - lon1) * math.pi / 180.0


    # convert to radians

    lat1 = (lat1) * math.pi / 180.0

    lat2 = (lat2) * math.pi / 180.0


    # apply formulae

    a = (pow(math.sin(dLat / 2), 2) +

         pow(math.sin(dLon / 2), 2) *

             math.cos(lat1) * math.cos(lat2));

    rad = 6371

    c = 2 * math.asin(math.sqrt(a))

    return rad * c


# Driver code

if __name__ == "__main__":

    lat1 = 51.5081

    lon1 = 0.0759

    lat2 = 48.8738

    lon2 = -2.2950


    print("Haversine distance in miles ",haversine(lat1, lon1,lat2, lon2)/1.6)


# This code is contributed

# by ChitraNayal


LocationOneV = lon1

LocationTwoV = lon2

LocationOneH = lat1

LocationTwoH = lat2

#My own version of distance created using the flat earth model

    #Distance calculation

DistanceV = (LocationOneV - LocationTwoV) *54.6

DistanceH = (LocationOneH - LocationTwoH) *68.7

DistanceCalc = (DistanceV*DistanceV)+(DistanceH*DistanceH)

ActualDistance = math.sqrt(DistanceCalc)

print("Distance in Miles using flat earth calculation ", ActualDistance)


TowerOfLondon = (51.5081, 0.0759)

ArcDeTriomph = (48.873756, 2.294946)

print("Vincenty miles ", vincenty(TowerOfLondon, ArcDeTriomph , miles=True))


This, of course, required the Vincenty library which is here:

import math


# WGS 84

a = 6378137  # meters

f = 1 / 298.257223563

b = 6356752.314245  # meters; b = (1 - f)a


MILES_PER_KILOMETER = 0.621371


MAX_ITERATIONS = 200

CONVERGENCE_THRESHOLD = 1e-12  # .000,000,000,001


def vincenty_inverse(point1, point2, miles=False):

    """

    Vincenty's formula (inverse method) to calculate the distance (in

    kilometers or miles) between two points on the surface of a spheroid


    Doctests:

    >>> vincenty((0.0, 0.0), (0.0, 0.0))  # coincident points

    0.0

    >>> vincenty((0.0, 0.0), (0.0, 1.0))

    111.319491

    >>> vincenty((0.0, 0.0), (1.0, 0.0))

    110.574389

    >>> vincenty((0.0, 0.0), (0.5, 179.5))  # slow convergence

    19936.288579

    >>> vincenty((0.0, 0.0), (0.5, 179.7))  # failure to converge

    >>> boston = (42.3541165, -71.0693514)

    >>> newyork = (40.7791472, -73.9680804)

    >>> vincenty(boston, newyork)

    298.396057

    >>> vincenty(boston, newyork, miles=True)

    185.414657

    """


    # short-circuit coincident points

    if point1[0] == point2[0] and point1[1] == point2[1]:

        return 0.0


    U1 = math.atan((1 - f) * math.tan(math.radians(point1[0])))

    U2 = math.atan((1 - f) * math.tan(math.radians(point2[0])))

    L = math.radians(point2[1] - point1[1])

    Lambda = L


    sinU1 = math.sin(U1)

    cosU1 = math.cos(U1)

    sinU2 = math.sin(U2)

    cosU2 = math.cos(U2)


    for iteration in range(MAX_ITERATIONS):

        sinLambda = math.sin(Lambda)

        cosLambda = math.cos(Lambda)

        sinSigma = math.sqrt((cosU2 * sinLambda) ** 2 +

                             (cosU1 * sinU2 - sinU1 * cosU2 * cosLambda) ** 2)

        if sinSigma == 0:

            return 0.0  # coincident points

        cosSigma = sinU1 * sinU2 + cosU1 * cosU2 * cosLambda

        sigma = math.atan2(sinSigma, cosSigma)

        sinAlpha = cosU1 * cosU2 * sinLambda / sinSigma

        cosSqAlpha = 1 - sinAlpha ** 2

        try:

            cos2SigmaM = cosSigma - 2 * sinU1 * sinU2 / cosSqAlpha

        except ZeroDivisionError:

            cos2SigmaM = 0

        C = f / 16 * cosSqAlpha * (4 + f * (4 - 3 * cosSqAlpha))

        LambdaPrev = Lambda

        Lambda = L + (1 - C) * f * sinAlpha * (sigma + C * sinSigma *

                                               (cos2SigmaM + C * cosSigma *

                                                (-1 + 2 * cos2SigmaM ** 2)))

        if abs(Lambda - LambdaPrev) < CONVERGENCE_THRESHOLD:

            break  # successful convergence

    else:

        return None  # failure to converge


    uSq = cosSqAlpha * (a ** 2 - b ** 2) / (b ** 2)

    A = 1 + uSq / 16384 * (4096 + uSq * (-768 + uSq * (320 - 175 * uSq)))

    B = uSq / 1024 * (256 + uSq * (-128 + uSq * (74 - 47 * uSq)))

    deltaSigma = B * sinSigma * (cos2SigmaM + B / 4 * (cosSigma *

                 (-1 + 2 * cos2SigmaM ** 2) - B / 6 * cos2SigmaM *

                 (-3 + 4 * sinSigma ** 2) * (-3 + 4 * cos2SigmaM ** 2)))

    s = b * A * (sigma - deltaSigma)


    s /= 1000  # meters to kilometers

    if miles:

        s *= MILES_PER_KILOMETER  # kilometers to miles


    return round(s, 6)


vincenty = vincenty_inverse


if __name__ == '__main__':

    import doctest

    doctest.testmod()


Friday, August 5, 2022

Direction given two grid coordinates

 This is the code to calculate a compass bearing given two geographical coordinates.

#!/usr/bin/env python3

# -*- coding: utf-8 -*-

"""

Created on Tue Jul 19 12:04:26 2022

"""

import math

DiameterOfEarth = 7917.5

RadiusOfEarth = 3961


#Assumung two fixed point - just for the sake of making life easy...

#North = positive values. South = negative values

#West = Positive values, East = negative values

LocationOneV = 51.5081

LocationOneH = 0.0759

#Tower of London


LocationTwoV = 48.8738

LocationTwoH = -2.2950

#Arc de Triomph


X = math.cos(LocationTwoV)*math.sin(LocationOneH-LocationTwoH)

Y = (math.cos(LocationOneV)*math.sin(LocationTwoV)-math.sin(LocationOneV)*

    math.cos(LocationTwoV)*math.cos(LocationOneH-LocationTwoH))

Radians = math.atan2(X,Y)  #radians

print("radians ", Radians)

Degrees = math.degrees(Radians)

print ("Degrees", Degrees)

That was pretty easy, wasn't it? 

Wednesday, August 3, 2022

Navigation - how to do it with a drone

 First off, I'll apologize for writing a dull and tedious-looking article. But now I have, let's get started.

We're going to imagine we have a drone of unspecified range - possibly enough to go half way around the world. To do that we will need to know several things.

  • The altitude we will fly at - will it be a fixed altitude or a variable altitude?
  • Where we left from.
  • Where we're going.
  • Any waypoints along the route.
The altitude is a tricky one - the highest mountain in the world is Mount Everest at 29,000 feet or thereabouts. That means that to be truly free of hitting ground based obstacles, a height of 30,000 feet is needed. Because planes use 30,000 feet perhaps a higher altitude so as not to bump into any. That takes us to 35,000 feet or possibly 40,000 feet. That airspace should be relatively free aside from America's U2 spy planes on the way up or down to 60,000 feet. 

Being so high really isn't that practical for most purposes. Sure - if the drone is solar-powered or even nuclear powered and aimed at long duration flight for weeks or months then being high has great advantages. For the vast majority of flights, being low has its advantages. For this reason we're going to assume we're flying a drone to deliver aid into a hostile land where cargo planes get shot down.

For a flight like that, staying below radar is a pretty good idea. Thus our altitude will be around 80 feet above the ground. How do we calculate that we are 80 feet above the ground and what do we do about skyscrapers? That's all pretty straightforward. We don't need to stay consistently at 80 feet, we can go higher to skip over obstacles or even just go around them.

Calculating height off the ground has its challenges. An altimeter is good but only calculates height above sea level and is skewed by air pressure changes due to weather. GPS satellites also provide altitude calculations but as before - only altitude above sea level. The world is not level - there are mountains. Thus we need to resort to one of three known methods.
  1. We can use radar to tell the distance from the ground - good stuff but radar can be picked up by hostiles and used for target aquisition.
  2. We can use sonar - this is how the cruise missile used to do it. It works pretty well - send a wide sweep of sound and listen for the time difference between sending and receiving the pings. This does reduce maximum speed somewhat as the ping has to get back in order to judge altittude.
  3. Lazer - not a bad method though most lazer rangefinders seem to be very limited in range. There's also the question as to how it'd work over water.
If we relied on GPS for altitude there would be an issue if it was jammed as is likely to happen over hostile territory. Even including Glonass (Russian), Baidu (Chinese) or Gallileo (European) as well as GPS (American) won't help much because the signals are all weak and easy to overwhelm. 

Where we left from is a pretty easy thing. That can be keyed in manually or read from GPS. As long as we have that coordinate we are well on the way to navigating. The next step is to know the destination. I'll skip waypoints as it's just a case of treating the last waypoint as the origin position and the next one as the destination.

Knowing where we're coming from and where we're going to are vitally important. We can ignore altitude for now though that will come back into play if we actually built a drone.

To get from the origin to the destination we need to know the direction in which to head. This is calculated using the Haversine method. That gives us the bearing we need:
Formula: θ = atan2( sin Δλ ⋅ cos φ2 , cos φ1 ⋅ sin φ2 − sin φ1 ⋅ cos φ2 ⋅ cos Δλ )
where φ1,λ1 is the start point, φ2,λ2 the end point (Δλ is the difference in longitude)
At the start of the mission it's probably also a good idea to record the difference between magnetic north and true north so that in the event of satellites being unavailable, navigation can be carried out using heading and flight duration versus speed. 

Knowing the distance between the start and the finish are very important too. That combined with a flight timer allows us to calculate in the event of no satellites, where to deliver the payload. This is calculated with the Vincenty method. 

Between two nearly antipodal points, the iterative formula may fail to converge; this will occur when the first guess at λ as computed by the equation above is greater than π in absolute value.

That gives a distance accurate to within 0.5mm between any two points on the earth's surface.

I'll leave it there because your mind is probably reeling right now. At some future point I'll talk about Kalman equations needed to turn an acelerometer from a gaming toy to a serious device that helps a drone fly level.


Sunday, May 1, 2022

Morse Code Generator

This is a Morse Code generator project using a Raspberry Pi Pico. Two breadboards are used - one has a 1k resistor, 3v buzzer and a PNP transistor (it doesn't matter which one). Some work still needs to be done on the code timing. 


from machine import Pin, Timer

import utime

led = Pin(25, Pin.OUT)

buzzer = Pin(15, Pin.OUT)

utimer = Timer()

#led.value(1)

#buzzer.value(1)

#utime.sleep(0.5)

led.value(0)

buzzer.value(0)

MasterTime = 0.05

Dash = (MasterTime * 3)

Dot = MasterTime

Space = (MasterTime * 7)

CharSpace = (MasterTime * 3)

InterCharSpace = MasterTime

def SendLetter(Letter: str) -> None:

    led.value(0)

    MaxLength = len(Letter)

    for MorseCounter in range (0,MaxLength):

        if Letter[MorseCounter] == '-':

            led.value(1)

            buzzer.value(1)

            utime.sleep(Dash)

            buzzer.value(0)

            led.value(0)

        else:

            led.value(1)

            buzzer.value(1)

            utime.sleep(Dot)

            buzzer.value(0)

            led.value(0)

    utime.sleep(InterCharSpace)

#Morse Code

morse = {

    'a': '.-',

    'b': '-...',

    'c': '-.-.',

    'd': '-..',

    'e': '.',

    'f': '..-.',

    'g': '--.',

    'h': '--.',

    'i': '..',

    'j': '.---',

    'k': '-.-',

    'l': '.-..',

    'm': '--',

    'n': '-.',

    'o': '---',

    'p': '.--.',

    'q': '--.-',

    'r': '.-.',

    's': '...',

    't': '-',

    'u': '..-',

    'v': '...-',

    'w': '.--',

    'x': '-..-',

    'y': '-.--',

    'z': '--..',

    '0': '-----',

    '1': '.----',

    '2': '..---',

    '3': '...--',

    '4': '....-',

    '5': '.....',

    '6': '-....',

    '7': '--...',

    '8': '---..',

    '9': '----.',

    '&': '.-...',

    "'": '.----.',

    '@': '.--.-.',

    ')': '-.--.-',

    '(': '-.--.',

    ':': '---...',

    ',': '--..--',

    '=': '-...-',

    '!': '-.-.--',

    '.': '.-.-.-',

    '-': '-....-',

    '*': '-..-',

    '%': '------..-.-----',

    '+': '.-.-.',

    '"': '.-..-.',

    '?': '..--..',

    '/': '-..-.',

}

char: str

MessageToSend: str = "In 1814, we took a little trip Along with Colonel Jackson down the mighty Mississip'"

MessageToSend = MessageToSend.lower()

for char in MessageToSend:

    if char != ' ':

        SendLetter(morse.get(char))

        utime.sleep(CharSpace)

        print(f'{char} {morse.get(char)}')

    else:

        print('space')

        utime.sleep(Space)


Sunday, April 10, 2022

A quickie still photo project

from picamera import PiCamera
from time import sleep
camera = PiCamera()
#camera.start_preview()
#sleep(5)
camera.capture('/home/pi/Desktop/imageWithNoPreview.jpg')
#camera.stop_preview()

With the preview to the camera and the sleep commented out, the image produced is significantly fuzzier than the image produced with the time delay and preview functioning, as evidenced by the two photos.

This poses a negligible problem for most people who are using Raspberry Pi just for experiments. For those that want to do it more seriously, setting the camera going a few seconds before it is used is a great advantage despite the increase in power consumption.

Camera used UV Pi camera
Pi used- 3B+
Software: Raspbian Buster, Thonny

No Preview

With Preview


Saturday, March 19, 2022

Motions sensitive imaging using a Raspberry Pi

One of the interesting things one can do, in this case using a Raspberry Pi and an infrared camera is to take motion-activatedpictures. It's possible to do video too and stills but for this example it's motion-sensitive images.

The GIF shown is made of 20 separate images as a hand was moved in front of the camera. This is definitely not a video. The code to do this is shown below and was written by somebody from MIT.

The original code has been modified to display on the screen, the filename used. Just to avoid confusion, the images are stored in a desktop folder called "NAS". 

This does show rather the limitations of the Raspberry Pi in that between each photo it really does need 2 -3 seconds to read the brightness of a scene. Having said that, the Pi is an excellent little computer that can be used to develop proof of concept applications.

Something to have fun with.

#! /usr/bin/env python3

#
#The MIT License (MIT)
#Copyright (c) 2014 Ron Ostafichuk
#
#Permission is hereby granted, free of charge, to any person obtaining a copy
#of this software and associated documentation files (the "Software"), to deal
#in the Software without restriction, including without limitation the rights
#to use, copy, modify, merge, publish, distribute, sublicense, and/or sell
#copies of the Software, and to permit persons to whom the Software is
#furnished to do so, subject to the following conditions:
#
#The above copyright notice and this permission notice shall be included in all
#copies or substantial portions of the Software.
#
#THE SOFTWARE IS PROVIDED "AS IS", WITHOUT WARRANTY OF ANY KIND, EXPRESS OR
#IMPLIED, INCLUDING BUT NOT LIMITED TO THE WARRANTIES OF MERCHANTABILITY,
#FITNESS FOR A PARTICULAR PURPOSE AND NONINFRINGEMENT. IN NO EVENT SHALL THE
#AUTHORS OR COPYRIGHT HOLDERS BE LIABLE FOR ANY CLAIM, DAMAGES OR OTHER
#LIABILITY, WHETHER IN AN ACTION OF CONTRACT, TORT OR OTHERWISE, ARISING FROM,
#OUT OF OR IN CONNECTION WITH THE SOFTWARE OR THE USE OR OTHER DEALINGS IN THE
#SOFTWARE.


import io
import os
import time
import picamera
import numpy as np


widthH = 2592 # too slow for motion check, only use for the save sequence 
heightH = 1944
width = 1440 # use lower resolution for motion check
height = 1080


threshold = 30 # how much must the color value (0-255) change to be considered a change
minPixelsChanged = width * height * 2 / 100 # % change  # how many pixels must change to begin a save sequence
print("minPixelsChanged=",minPixelsChanged) # debug


print ('Creating in-memory stream')
stream = io.BytesIO()
step = 1  # use this to toggle where the image gets saved
numImages = 1 # count number of images processed
captureCount = 0 # flag used to begin a sequence capture


# function to generate a sequence of 20 filenames for the picamera capture_sequence command to use
def filenames():
    frame = 0
    fileName = time.strftime("NAS/%Y%m%d/%Y%m%d-%H%M%S-",time.localtime())
    while frame < 20:
        yield '%s%02d.jpg' % (fileName, frame)
        frame += 1


# begin monitoring
with picamera.PiCamera() as camera:
    time.sleep(1) # let camera warm up
    try:
        while threshold > 0:
            camera.resolution = (1440,1080) # use a smaller resolution for higher speed compare


            print ('Capture ' , numImages)
            if step == 1:
                stream.seek(0)
                camera.capture(stream, 'rgba',True) # use video port for high speed
                data1 = np.fromstring(stream.getvalue(), dtype=np.uint8)
                step = 2
            else:
                stream.seek(0)
                camera.capture(stream, 'rgba',True)
                data2 = np.fromstring(stream.getvalue(), dtype=np.uint8)
                step = 1
            numImages = numImages + 1


            if numImages > 4:  # ignore first few images because if the camera is not quite ready it will register as motion right away
                # look for motion unless we are in save mode
                if captureCount <= 0:
                    print("Compare")
                    # not capturing, test for motion (very simplistic, but works good enough for my purposes)
                    data3 = np.abs(data1 - data2)  # get difference between 2 successive images
                    numTriggers = np.count_nonzero(data3 > threshold) / 4 / threshold #there are 4 times the number of pixels due to rgba


                    print("Trigger cnt=",numTriggers)


                    if numTriggers > minPixelsChanged:
                        captureCount = 1 # capture ? sequences in a row
                        # make sure directory exists for today
                        d = time.strftime("NAS/%Y%m%d") #unfortunately this saves as UTC time instead of local, will fix it later sorry
                        if not os.path.exists(d):
                            os.makedirs(d)


                if captureCount > 0:
            # in capture mode, save an image in hi res
                    camera.resolution = (widthH,heightH)
                    dtFileStr = time.strftime("NAS/%Y%m%d/%Y%m%d-%H%M%S-00.jpg",time.localtime()) # once again, UTC time instead of local time
                    print("Saving sequence ",dtFileStr)
                    # save full resolution images to the NAS
                    camera.capture_sequence(filenames(),'jpeg',use_video_port=True, quality=92)
                    captureCount = captureCount-1
                    print(filenames())


    finally:
        camera.close()
        print ('Program Terminated')


Friday, February 18, 2022

The first fun project - GPS

 Using Python and a G-Mouse. The G-Mouse is a very poorly named device as it has the same name as an actual computer mouse by Logitech but go figure - it's likely a Chinese thing.

This mundane little device can be hooked up to a computer and used to find the location of the computer via the satellite Global Positioning System to within about 20 feet.

This project was carried out on a laptop running Linux Mint. There are some things to do first or the whole thing won't work,

First... Install Putty on Linux.

Next, in Terminal, type sudo putty -serial /dev/ttyACM0

Then REBOOT the computer so that it'll take effect.

Next type sudo usermod -a -G dialout $(whoami)

That will gain you access to the serial port.

The following software (copied) from GitHub will read your GPS...

#!/usr/bin/env python3
# Original Code: https://gist.github.com/Lauszus/5785023#file-gps-py
# Created by: Kristian Sloth Lauszus

import time
import serial

def readString():
    while 1:
        while ser.read().decode("utf-8") != '$':  # Wait for the begging of the string
            pass  # Do nothing
        line = ser.readline().decode("utf-8")  # Read the entire string
        return line


def getTime(string, format, returnFormat):
    return time.strftime(returnFormat,
                         time.strptime(string, format))  # Convert date and time to a nice printable format


def getLatLng(latString, lngString):
    lat = latString[:2].lstrip('0') + "." + "%.7s" % str(float(latString[2:]) * 1.0 / 60.0).lstrip("0.")
    lng = lngString[:3].lstrip('0') + "." + "%.7s" % str(float(lngString[3:]) * 1.0 / 60.0).lstrip("0.")
    return lat, lng


def printRMC(lines):
    print("========================================RMC========================================")
    # print(lines, '\n')
    print("Fix taken at:", getTime(lines[1] + lines[9], "%H%M%S.%f%d%m%y", "%a %b %d %H:%M:%S %Y"), "UTC")
    print("Status (A=OK,V=KO):", lines[2])
    latlng = getLatLng(lines[3], lines[5])
    print("Lat,Long: ", latlng[0], lines[4], ", ", latlng[1], lines[6], sep='')
    print("Speed (knots):", lines[7])
    print("Track angle (deg):", lines[8])
    print("Magnetic variation: ", lines[10], end='')
    if len(
            lines) == 13:  # The returned string will be either 12 or 13 - it will return 13 if NMEA standard used is above 2.3
        print(lines[11])
        print("Mode (A=Autonomous, D=Differential, E=Estimated, N=Data not valid):", lines[12].partition("*")[0])
    else:
        print(lines[11].partition("*")[0])

    return


def printGGA(lines):
    print("========================================GGA========================================")
    # print(lines, '\n')
    print("Fix taken at:", getTime(lines[1], "%H%M%S.%f", "%H:%M:%S"), "UTC")
    latlng = getLatLng(lines[2], lines[4])
    print("Lat,Long: ", latlng[0], lines[3], ", ", latlng[1], lines[5], sep='')
    print("Fix quality (0 = invalid, 1 = fix, 2..8):", lines[6])
    print("Satellites:", lines[7].lstrip("0"))
    print("Horizontal dilution:", lines[8])
    print("Altitude: ", lines[9], lines[10], sep="")
    print("Height of geoid: ", lines[11], lines[12], sep="")
    print("Time in seconds since last DGPS update:", lines[13])
    print("DGPS station ID number:", lines[14].partition("*")[0])
    return


def printGSA(lines):
    print("========================================GSA========================================")
    # print(lines, '\n')

    print("Selection of 2D or 3D fix (A=Auto,M=Manual):", lines[1])
    print("3D fix (1=No fix,2=2D fix, 3=3D fix):", lines[2])
    print("PRNs of satellites used for fix:", end='')
    for i in range(0, 12):
        prn = lines[3 + i].lstrip("0")
        if prn:
            print(" ", prn, end='')
    print("\nPDOP", lines[15])
    print("HDOP", lines[16])
    print("VDOP", lines[17].partition("*")[0])
    return


def printGSV(lines):
    if lines[2] == '1':  # First sentence
        print("========================================GSV========================================")
    else:
        print("===================================================================================")
    # print(lines, '\n')

    print("Number of sentences:", lines[1])
    print("Sentence:", lines[2])
    print("Satellites in view:", lines[3].lstrip("0"))
    for i in range(0, int(len(lines) / 4) - 1):
        print("Satellite PRN:", lines[4 + i * 4].lstrip("0"))
        print("Elevation (deg):", lines[5 + i * 4].lstrip("0"))
        print("Azimuth (deg):", lines[6 + i * 4].lstrip("0"))
        print("SNR (higher is better):", lines[7 + i * 4].partition("*")[0])
    return


def printGLL(lines):
    print("========================================GLL========================================")
    # print(lines, '\n')

    latlng = getLatLng(lines[1], lines[3])
    print("Lat,Long: ", latlng[0], lines[2], ", ", latlng[1], lines[4], sep='')
    print("Fix taken at:", getTime(lines[5], "%H%M%S.%f", "%H:%M:%S"), "UTC")
    print("Status (A=OK,V=KO):", lines[6])
    if lines[7].partition("*")[0]:  # Extra field since NMEA standard 2.3
        print("Mode (A=Autonomous, D=Differential, E=Estimated, N=Data not valid):", lines[7].partition("*")[0])
    return


def printVTG(lines):
    print("========================================VTG========================================")
    # print(lines, '\n')

    print("True Track made good (deg):", lines[1], lines[2])
    print("Magnetic track made good (deg):", lines[3], lines[4])
    print("Ground speed (knots):", lines[5], lines[6])
    print("Ground speed (km/h):", lines[7], lines[8].partition("*")[0])
    if lines[9].partition("*")[0]:  # Extra field since NMEA standard 2.3
        print("Mode (A=Autonomous, D=Differential, E=Estimated, N=Data not valid):", lines[9].partition("*")[0])
    return


def checksum(line):
    checkString = line.partition("*")
    checksum = 0
    for c in checkString[0]:
        checksum ^= ord(c)

    try:  # Just to make sure
        inputChecksum = int(checkString[2].rstrip(), 16);
    except:
        print("Error in string")
        return False

    if checksum == inputChecksum:
        return True
    else:
        print("=====================================================================================")
        print("===================================Checksum error!===================================")
        print("=====================================================================================")
        print(hex(checksum), "!=", hex(inputChecksum))
        return False

if __name__ == '__main__':
    ser = serial.Serial('/dev/ttyACM0', 9600, timeout=1)  # Open Serial port
    try:
        while True:
            line = readString()
            lines = line.split(",")
            if checksum(line):
                if lines[0] == "GPRMC":
                    printRMC(lines)
                    pass
                elif lines[0] == "GPGGA":
                    printGGA(lines)
                    pass
                elif lines[0] == "GPGSA":
                    # printGSA(lines)
                    pass
                elif lines[0] == "GPGSV":
                    # printGSV(lines)
                    pass
                elif lines[0] == "GPGLL":
                    printGLL(lines)
                    pass
                elif lines[0] == "GPVTG":
                    printVTG(lines)
                    pass
                else:
                    print("\n\nUnknown type:", lines[0], "\n\n")
    except KeyboardInterrupt:
        print('Exiting Script') 

If that doesn't work for you then try the following...

sudo apt-get install gpsd gpsd-clients

Then

sudo cat /dev/ttyACM0

That should get you a result.

The results produced by the Python code are as follows

========================================RMC========================================

Fix taken at: Tue Feb 08 15:41:16 2022 UTC

Status (A=OK,V=KO): A

Lat,Long: 47.8076043N, 7.2157055W

Speed (knots): 0.437

Track angle (deg): 

Magnetic variation:  

Mode (A=Autonomous, D=Differential, E=Estimated, N=Data not valid): A

========================================VTG========================================

True Track made good (deg):  T

Magnetic track made good (deg):  M

Ground speed (knots): 0.437 N

Ground speed (km/h): 0.809 K

Mode (A=Autonomous, D=Differential, E=Estimated, N=Data not valid): A

========================================GGA========================================

Fix taken at: 15:41:16 UTC

Lat,Long: 47.8076043N, 7.2157055W

Fix quality (0 = invalid, 1 = fix, 2..8): 1

Satellites: 3

Horizontal dilution: 4.91

Altitude: 67.4M

Height of geoid: -32.3M

Time in seconds since last DGPS update: 

DGPS station ID number: 

========================================GLL========================================

Lat,Long: 47.8076043N, 7.2157055W

Fix taken at: 15:41:16 UTC

Status (A=OK,V=KO): A

Mode (A=Autonomous, D=Differential, E=Estimated, N=Data not valid): A

It can take a few minutes for the GPS mouse to lock onto satellites and produce a result so don't be upset if the Python code crashes the first few times you try to run it. 


Saturday, November 20, 2021

Google tomfoolery

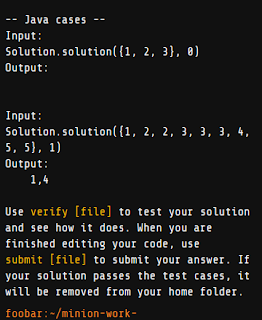
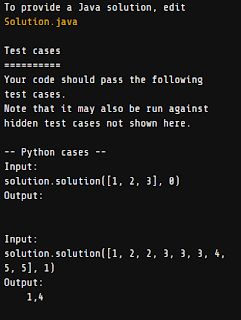
Occasionally when coding some solution it becomes expeditious to use Google to find the answer to a coding question. It can be faster than walking over to the shelf where a particular coding manual is sitting and at the end of the day when one is tired, this is often the case. To cut a long story short, a Python coding question was entered into Google then, instead of producing the answer, the web browser did some funky stuff. The browser window turned into a letter box slit then went white and up came a silly "foo bar" game from Google. Who has time for this nonsense? 

A silly sci-fi scenario popped up followed by a basic coding question about tallying values in lists.

Aside from the basic question of what Google is trying to achieve, is blocking what the Google user is searching for and showing them this nonsense really sensible? Is this perhaps the best advertisement for Duck Duck Go as an alternate browser? This is the kind of time-wasting codswallop that serves just to annoy Google Users.

Here are some screenshots of what their question was. It was unexpected which is why there are not screenshots of earlier screens.


Thursday, July 29, 2021

A new logo

It was decided the group needs a logo. As finances are stretched, after browsing some of the commercial sites and being frankly unimpressed, Inkscape was downloaded and the simplest logo ever created. Full marks to Inkscape for its features and ease of use.


Wednesday, July 21, 2021

Fun projects

From time to time it is anticipated that fun projects will be created and displayed with the intent being simplicity and something the average viewer can attempt on their own. These will be referenced from the fun projects page and will appear in the blog itself as a blog entry.

Science doesn't always have to be deadly serious. Our main projects might be mainly for military application but our fun projects certainly are not.

We hope you will enjoy the fun projects, try them and tell your friends all about them.

Fun Project #1 GPS


Saturday, July 17, 2021

New Domain Name

We had been operating without a domain name then bought one from a supplier that then found themselves unable to fulfill their commitments. Hence, domain name 2. More money out but at least this domain works.

Monday, July 5, 2021

Testing...

A first test to see if the blog part of the site works.